2022-06-16
Back in April, I gave a talk for the University of Maryland's Cybersecurity Club on homelabbing and gave a tour of my setup. I figured it'd be nice to cement some of that knowledge in a blog post to refer back to and update over time, for my sake and for whoever reads this.
The way I see and define a homelab is the collective network of internet-capable devices around your home, organized with the goal of providing useful services, alternative services to paid one, a sandbox for experimenting with software, and improved usability and security compared to a typical arrangement of consumer plug-and-play devices.
My brother got interested in enterprise server equipment and self-hosting services from one of his friends, and ended up piquing my interest to pick up a small HPE Proliant Microserver to toy with. I was constrained to 4 cores from my CPU upgrade options, so I had a crazy idea with a few goals in mind:
From these goals, there were a two main challenges that needed to be solved to make this happen:
I figured if I was able to get compatibility with all of the hardware, then I could spend some time to iron out the software issues.
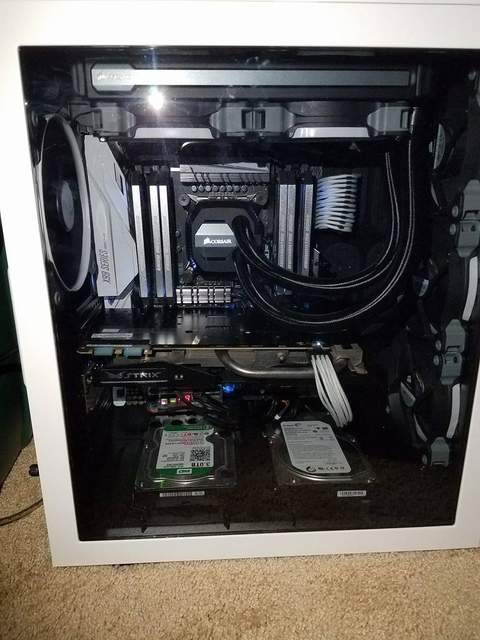
My old pc had a LOT of expensive parts that I wasn't willing to easily part with, including:
In the early stages of this build, I realized that my motherboard was compatible with Intel Xeon CPUs as well as ECC RAM, so upgrading in the future was definitely feasible. It would make sense to extend some life for my parts with retired enterprise components off of eBay rather than buying completely new into the latest generation hardware.
For the case, I stumbled upon the Sliger Cerberus X. Sliger claims it to be the world's smallest ATX computer case, so it seemed to fit my needs. I called with a sales representative to try and verify if there would be enough room in the case for four large hard drives, and he said it would probably be fine. It was definitely pricier than any other regular case, but I justified it with the savings from not buying new parts. Plus, I could attach a handle to it!
While my HPE microserver had an interface for my SAS drives, my motherboard didn't. Luckily, the seller from whom I bought it threw in an HBA card, so I ended up gutting that for my build.
I ended up needing to purchase an SFX power supply and a shorter CPU heatsink to fit in the case, but I was otherwise ready to put it together.
After everything arrived, I gutted my PC and started placing parts into the case. I took for granted how much of a difference the extra space in a large case makes, so it took a while until I was satisfied with the cable management of most of the parts.
When it came to installing the hard drives, I realized that it would be an extremely tight fit, and that I would not be able to fit some of the fans I would have liked on the front of the case. The SAS-to-SATA cable I had also wouldn't fit, as I had about an inch of clearance between the two drives. I ended up waiting a week to order right-angle SAS-to-SATA adapters, and had to stagger the drives a bit to get things to fit.
Everything eventually fit, though the cooling solution was incredibly suboptimal. There just wasn't enough airflow throughout the case. I would like to go back and redo things when I have some spare time, but in the moment, I wanted to get my system running again.
I was running Proxmox on my microserver, so I naturally chose it to be my hypervisor for the new system. I was aware that GPU passthrough was possible in Linux, granting Windows guest VMs close-to-native performance in gaming, so it was an added benefit that Proxmox itself is based off of Debian.
After installation was complete, I sought to get a Windows VM up and running. I followed all of the steps provided in various guides, but quickly ran into a significant problem...
When a computer boots up, it hooks the first video device available on the system to display BIOS information, with whatever host OS doing the same after POST. The issue is that because my CPU nor motherboard support integrated graphics, the hypervisor will retain access to the only graphics device in the system. Because of this, passing the GPU through to the guest VM will not work.
I ended up finding a solution that some people who run Linux as the main OS on laptops do, to essentially relinquish the graphics device from the host OS whenever they startup a guest VM with passthrough. This ended up working, but I found myself stuck since I had it run on every reboot, and had ended up breaking networking capabilities after passing in an ethernet controller rather than a USB controller to the VM.
After re-installation, things ended up working fairly smoothly. I wrote a script that I'll need to run once after reboot if I wish to use the Windows VM:
#!/bin/sh
set -x

echo 0 > /sys/class/vtconsole/vtcon0/bind
echo 0 > /sys/class/vtconsole/vtcon1/bind

echo efi-framebuffer.0 > /sys/bus/platform/drivers/efi-framebuffer/unbind
sleep 2
This script unbinds any video devices and the framebuffer from the host OS, allowing me to display whatever I want to a screen through the Windows guest.
I ended up avoiding passing in the entire USB controller to the VM, but rather individual devices based on ID. This worked perfectly fine for a mouse and keyboard, but it caused my audio interface to act up whenever I had to remove or insert a new device. This became cumbersome, so I ended up using Parsec to use my computer from a laptop. At home on a gigabit connection, perceived latency was tolerable enough to still enjoy multiplayer games.
I had only started to tinker with OpenMediaVault on the microserver, but I decided to fully load up my system with as many useful services as I could imagine. Here's a list of things that I have since spun up:
After most of these services were set up, I wanted to add some quality-of-life features to my setup. Most of this involves networking, of which I have little practical knowledge.
I wanted to be able to access any of my services by simply using an internal domain name rather than an IP address and port. After struggling with Pi-hole's DNS management and a failing router in my room, I decided to try and do something crazy yet again - virtualizing my router via pfSense and attaching an enterprise-grade wireless access point.
A bit of research indicated that this idea seemed a bit crazy, but many of the comments discouraging this idea suggested the use of a dedicated rack-mounted router, which was much larger than my server and inconvenient without an entire rack setup. I just decided to go full-send with the idea regardless.
Another perk with workstation-grade motherboards is that they might have dual ethernet NICs, which is nice for bridging access to two networks or for use as a server. I ended up passing one NIC to a pfSense VM to use for WAN, along with a quad NIC card for LAN.
After a bit of light configuration, I was able to get internet access on the rest of my virtual machines. I set up a self-signed certificate using pfSense's built-in manager, and used HAProxy to set up reverse proxies to all of my containers with HTTPS enabled. DNS rules and static IP address for my virtual machines worked fine to get everything under a local domain.
Lastly, I wanted to be able to access all of my services wherever I go or travel. I would need to set up a VPN to my home network in order to do so, along with dynamic DNS for persistence across IP leases from my internet service provider. I chose WireGuard for the VPN, as it seemed fairly easy to set up on a multitude of devices, along with Google Domains for dynamic DNS as it's included with their domains.
I'm extremely happy with the current state of my homelab. It's fairly seamless to access and use any of my services at home and on the go, and they provide me with genuine utility that would have otherwise been fairly expensive to maintain with equivalent subscriptions. In addition, the entire setup is more-or-less plug-and-play if I ever had to move it to a new home or bring it to a LAN party. I've gotten comfortable with diving into new technologies and tinkering with configurations that I could reconstruct the system from scratch if I were to lose it all. Ain't that something to be proud of?
Going forward, I would like to revisit some of the hardware and software configurations and tidy things up with the power of hindsight. There's also a few services that would be lovely to add to my setup, including Visual Studio Code in the web browser, and a powerful ebook management system for books in public domain or short stories published on the web.
A list of parts that I currently use in my system can be viewed here. I've entered part prices based on what was spent at the time of purchase, and it probably doesn't reflect it's overall value today since a lot of it is fairly old.