2021-08-01
Quite a few of my friends have picked up mechanical keyboards as a hobby, and eventually get to the point where they would to solder a board. I hope to distill the essentials required to successfully solder.
Soldering is the process of using hot metal to join two pieces of metal together. The hot metal is solder, while the joined pieces are usually two of the following: electrical or physical components, wires, or pads. It's done to join different components together to make something functional, such as a mechanical keyboard.
At the very minimum, you need some solder, your components to join together, and something the melt the solder. Granted, you'll want something that's easy to use, as well as a few other things to help make soldering easier.
There's a two types of solder: lead solder and lead-free solder. Lead solder is some alloy that contains lead, while lead-free solder is, well, lead-free.
A common lead solder is tin-lead solder, and while it's sold in various ratios of tin-to-lead, I recommend to use 63/37 tin-lead solder. That is, lead with 63% tin and 37% lead. This composition causes 63/37 solder to be eutectic, where it melts at a single temperature, rather than a range of temperatures.
Lead-free solders tend to partially melt across a range of temperatures, which makes it a bit hard to work with, and so I highly recommend 63/37 lead solder over any lead-free solder. I use Kester 63/37 0.020" rosin core solder.
Though you could use a blowtorch, the less monkey means to melt solder is to use a soldering iron. It's more-or-less a hot stick of metal. A soldering iron you'd want to use is one that has a means of controlling temperature, as well as one that holds temperature well. My iron is a Hakko FX888D, which has digital temperature adjustment and replaceable tips, but I know people who use and love these newer portable irons, such as the TS100.
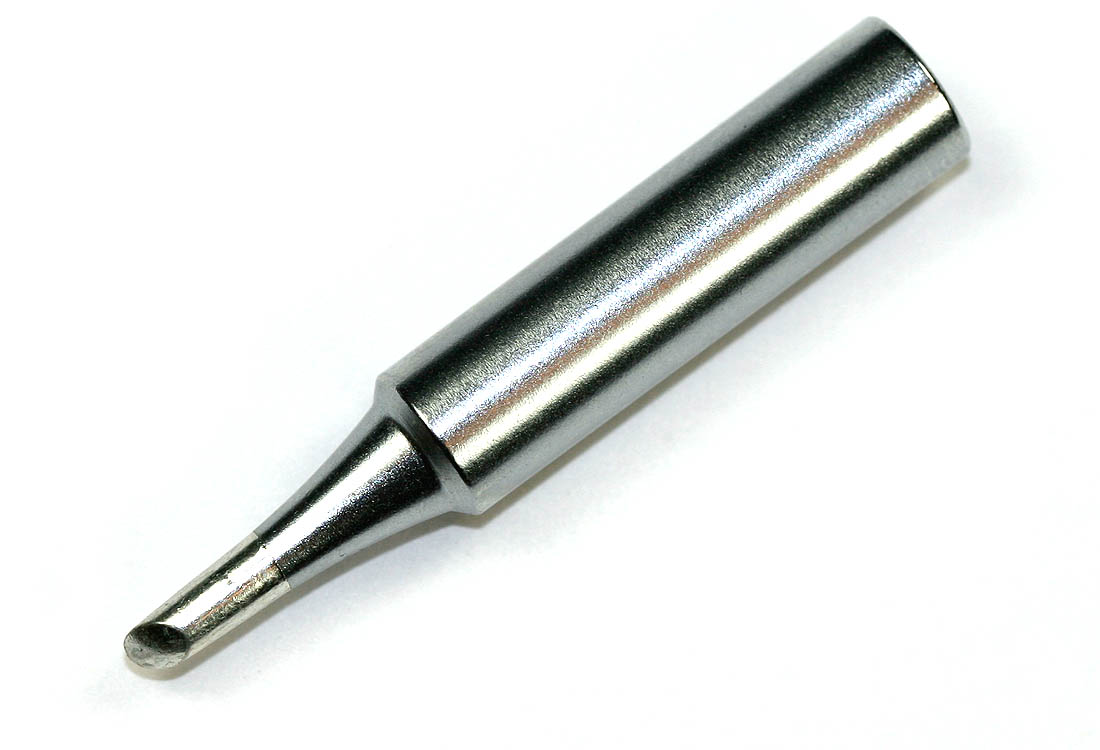
One thing to note is that the shape of the soldering tip can have an impact on your experience. For example, a chisel tip is good for larger components, through-hole components1, and desoldering. On the other hand, a bevel tip is easier to work with surface-mounted components2. I use a bevel tip, but a chisel tip is more than enough for keyboards.
Over time, your soldering tip will likely get tarnished/oxidized, especially if you leave it on for a few minutes without doing anything. To restore the tip, invest in a brass sponge, and scrape the iron's tip in the sponge a few times to remove a bit of oxidation. Apply a bit of solder on the tip, and then scrape it again in the sponge to remove excess solder. This process is called "tinning" your iron.
Flux is a compound that's extremely useful in soldering. It removes oxidation from metal surfaces and protects surfaces from being re-oxidized, thus letting solder flow like water onto various metal contacts. Most solder have central cores filled with a bit of solder, but it's helpful to have additional flux to make things easier.
Like solder, there's a few types of flux: rosin, no-clean, and water soluble.
Rosin flux is a tacky gel or paste. It's effective at doing its job, and doesn't need to be cleaned off of surfaces, though it has a tendency to get fairly messy, and is a bit difficult to clean.
No-clean flux can come as a liquid or a paste, and leaves behind little to no residue behind when heated up, hence the name "no-clean." It is slightly corrosive, and should be cleaned off if there's a lot of excess flux on your board or device.
Water soluble flux also comes as a paste or fluid (usually administered through a pen). This is the most aggressive and corrosive flux, and does need to be cleaned off. From its name, it can be cleaned off with distilled water. I wouldn't recommend using this unless you have access to an ultrasonic cleaner, or are comfortable giving your device a bath!
I personally have rosin flux and no-clean flux, and tend to use the rosin flux with a toothpick for through-hole components and for wires by dipping them in. I'd recommend a rosin flux, easily found on Amazon or a local electronics or hobby shop. If you fancy a no-clean flux, Kester 951 from a reputable source is some of the best stuff.
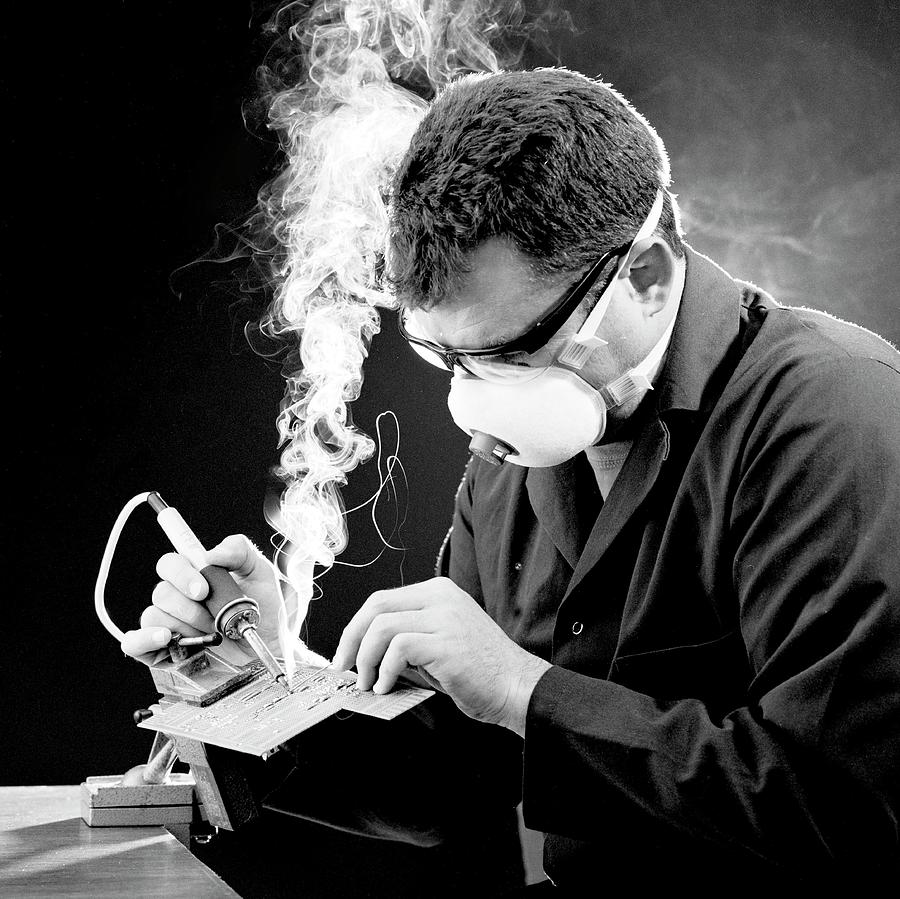
When soldering, you'll generate a lot of fumes by melting solder and flux. The fumes come from flux, and I would strongly suggest not breathing this stuff in, as your lungs probably have no good way of cleaning this stuff out. Definitely invest in a fume extractor of some kind, preferably one with a carbon filter, or do your soldering next to a box fan on speed 3 pointing to an open window.
I use a Hakko FA-400, but if I did more soldering work, I'd definitely invest in a Hakko FA-430. It wouldn't hurt to wear a face mask certified for some level of protection, like a legitimate N95 or KF94 mask.
At this point, you should have the following:
Set up what you need to solder. For a keyboard, this would be inserting switches into the plate while lining them up with the PCB, and flipping this assembly over.
Turn on the fume extractor, and have it close to the thing you're soldeirng. Turn on your iron to something above your solder's melting point (183 celcius, but preferably closer to 250-300 for quicker melting), tin the tip if needed, and put a small blob of solder on the iron's tip.
In your dominant hand goes the iron, and in your non-dominant hand goes a long enough wire of solder to hold at a comfortable distance. Touch the iron against the solder surface (a switch pin, for a keyboard) and feed fresh solder into the iron. The flux core in your solder should help the solder to flow onto the point of contact, as the contact points probably have some level of oxidization. When there's enough solder, briskly pull away the iron and solder from the joint.
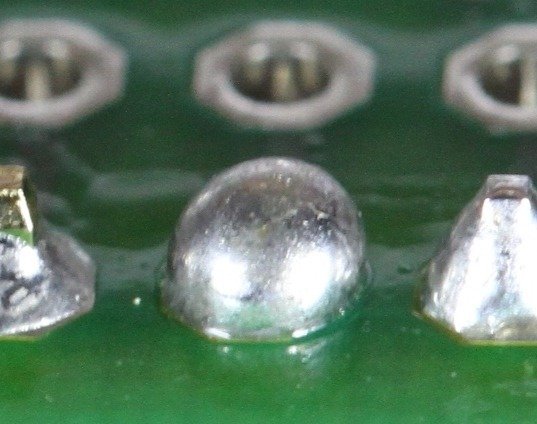
If done properly, the solder should have looked "wet" as it snaps away from the iron and forms a nice shape on the contact point. If the solder doesn't flow within a few seconds after feeding it into the iron and joint, put down the iron and wipe some flux on the joint and try again. You don't want to leave the iron on the surface for so long that it ends up burning and lifting off a pad or contact on a PCB, or melting some wire sheathing.
The process ought to be fairly quick and easy with the proper tools and setup. If it feels difficult, then you might be doing something wrong. If it feels tedious, it's just how it is, unfortunately.
If you accidentally applied too much solder, or joined together two contacts that shouldn't touch, don't fret. While even more tedious, there are ways to remedy these issues.
For excessive solder on a surface-mount or through-hole component, you can use desoldering braid to remove some of it. Desoldering braid is a braid of copper infused with a bit of flux. Upon heating, it removes oxidation on the solder with the flux, and pulls away solder into the braid via capillary action. The soldering braid I recommend is MG Chemicals 426, which can be found on Amazon.
Simply unravel a short length of braid, and using your hot iron, press it into the joint until solder starts flowing into the braid. Since copper easily conducts heat, be careful when holding the braid.
To fully remove solder out of a through-hole on a PCB, you will need a desoldering pump. It uses a loaded spring in a chamber to create a vacuum when actuated, sucking anything near its tip. I use a few cheap generic ones, but I've heard very good things about the ENGINEER SS-02.
To use a desoldering pump, wield it in the hand you'd hold your solder, and press down on the pump. With a thumb ready on the pump's trigger button, hold it near the offending through-hole. Use a hot iron to melt the solder on the joint, and once the solder is liquid, jam the tip of the pump on the joint and press the button. It takes a bit of practice since solder will quickly harden, and it requires a bit of coordination to aim the pump's tip onto the joint. You must have the pump's tip in contact with the solder, as the vacuum it creates isn't powerful enough to suck solder from a distance.
If there's still a bit of solder in the through-hole, as is the case when desoldering older electronics, you'll just need to fill it up with solder and try again. With enough luck and finesse, you should be able to fully evacuate the through-hole.
With any luck, my advice would have helped you to successfully solder your device. Congratulations!
In my opinion, soldering is a weird hobby where using cheaper "entry-level" tools and materials makes the process harder, and can be frustratingly discouraging. While you don't need to shell out an arm and a leg, you'll definitely need to spend a decent amount of money to produce good results.
The sum of all products mentioned in this article comes out to be around $200 to $250 USD, which isn't a small sum by any means. However, these tools and materials can last you a very long time (given they're treated well). In the five years I've spent soldering, I've only gone through one spool of solder, and still have a lot of flux and soldering braid leftover. I might be due for a replacement soldering tip, but I can probably get by with my current setup for another 5 years.
Electronic components that have a short wire or lead that are placed in a hole in a circuit board, then affixed. Usually how you make hobby electronics by hand, though necessery for larger components or those that need a bit more structural integrity.
Electronic components that are affixed to only the face of a circuit board, an innovation that has made it easier to assemble electronics by machine.